")

Table of Contents
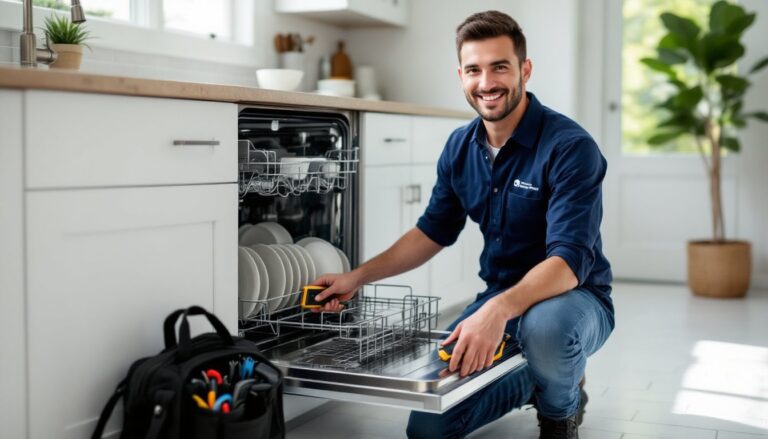
ToggleA dishwasher that won’t clean, drain, or stop leaking can bring kitchen routines to a halt. Before calling for a dishwasher repair service near me, many common problems can be diagnosed and fixed with basic tools and a bit of know-how. Most homeowners can tackle issues like clogged drains, poor spray arm performance, and minor leaks without professional help. This guide walks through the most frequent dishwasher failures, the tools needed to address them, and clear instructions for repairs that save both time and money. Whether it’s standing water at the bottom or dishes coming out still dirty, the following steps will help troubleshoot and fix the problem.
Key Takeaways
- Dishwasher repairs for common issues like clogged filters, kinked hoses, and blocked spray arms can be handled with basic tools and DIY techniques, saving time and money.
- Always disconnect power and water before starting any dishwasher repairs to ensure safety and prevent potential damage or flooding.
- Poor cleaning performance and drainage problems are often caused by mineral deposits, trapped food debris, or improper water temperature rather than mechanical failure.
- Door gaskets, inlet valves, and drain pumps are affordable, model-specific parts that homeowners can replace without professional help, typically costing under $100.
- Know when to call a professional: electrical issues, cracked tubs, motor replacements, and warranty coverage concerns should be left to qualified technicians.
- Proper dishwasher maintenance—including regular filter cleaning, correct detergent use, and proper loading—prevents most repair issues before they develop.
Signs Your Dishwasher Needs Repair
Recognizing early warning signs prevents small issues from escalating into costly failures. A dishwasher that leaves standing water after a cycle indicates a drainage problem, usually a clogged filter, kinked drain hose, or faulty drain pump. If dishes come out dirty or covered in film, the spray arms may be blocked, the water inlet valve could be restricted, or detergent isn’t dissolving properly.
Leaks pooling under the appliance or around the door signal worn gaskets, loose hose connections, or a cracked tub. Unusual noises, grinding, rattling, or squealing, often point to worn pump bearings, debris in the chopper blade, or a failing motor. A dishwasher that won’t start may have a tripped breaker, faulty door latch, or control board issue.
Strange odors, even after cleaning, suggest trapped food debris in the filter or drain line. For most of these symptoms, the fix is straightforward. But, electrical faults, cracked tubs, or motor replacements typically require a professional dishwasher repair service. Knowing what’s DIY-friendly versus what needs a washer and dryer fixer or appliance tech saves frustration and prevents voiding warranties.
Essential Tools and Safety Precautions
Before starting any repair, disconnect power at the breaker or unplug the unit. Most dishwashers are hardwired, so flipping the correct breaker is critical. If the unit is plugged in, pull the plug. Also, shut off the water supply at the valve under the sink to prevent flooding.
Tools and materials needed:
- Adjustable wrench and channel-lock pliers
- Screwdrivers (Phillips and flat-head)
- Needle-nose pliers
- Multimeter (for electrical diagnostics)
- Flashlight or headlamp
- Towels and a shallow pan (for catching water)
- Replacement parts as identified (filters, hoses, gaskets, inlet valves)
Safety gear:
- Safety glasses (protect against splashing water and debris)
- Work gloves (dishwasher interiors have sharp edges)
- Knee pads (optional, but helpful when kneeling)
Keep the owner’s manual handy, it includes model-specific diagrams and part numbers. If the manual is missing, most manufacturers host PDFs online searchable by model number. Always double-check that power and water are off before reaching inside the cabinet or removing panels.
Fixing a Dishwasher That Won’t Drain
Standing water at the bottom of the tub after a cycle is one of the most common complaints. Start with the simplest fixes and work toward more involved diagnostics.
Step 1: Clean the filter. Remove the lower dish rack and locate the cylindrical or flat filter assembly at the tub bottom. Twist or lift to remove (consult the manual if it’s stubborn). Rinse under hot water, scrubbing away grease and trapped food with a soft brush. Reinstall firmly, improper seating can cause leaks or poor drainage.
Step 2: Inspect the drain hose. Pull the dishwasher forward (you may need to remove toe kick screws). The drain hose runs from the pump to the garbage disposal or sink drain. Check for kinks, clogs, or sags. The hose should loop up higher than the connection point to prevent backflow, this is called a high loop or air gap and is required by many plumbing codes. If the hose is clogged, disconnect it at both ends and flush with water or use a plumbing snake.
Step 3: Clear the drain pump. If water still won’t drain, the pump may be obstructed. Access the pump (usually beneath the filter housing) by removing screws and the cover. Look for broken glass, bones, or hard debris jamming the impeller. Rotate the impeller by hand, it should spin freely. If it’s seized or the pump motor hums without moving water, the pump likely needs replacement. Pumps cost $50–$100 and are held in place with clamps or screws.
Step 4: Check the garbage disposal knockout plug. If the dishwasher drain hose connects to a new disposal, the knockout plug inside the disposal inlet must be removed. Failure to do this is a common installation error that blocks drainage completely.
Troubleshooting Poor Cleaning Performance
Dishes coming out dirty, spotted, or coated in film points to water flow or detergent issues, not a broken appliance. Start with the easiest checks.
Inspect spray arms. Remove the lower and upper spray arms by unscrewing or unclipping them. Hold each up to a light and look through the spray holes, clogs from mineral deposits or food debris are common. Use a toothpick or small wire to clear blocked holes. Rinse thoroughly and reinstall, ensuring they spin freely when nudged by hand.
Check water temperature. Dishwashers need water at 120°F to dissolve detergent and cut grease effectively. Run the kitchen faucet until the water is hot before starting a cycle, or increase the water heater setting slightly (don’t exceed 120°F if children are in the home).
Test the water inlet valve. Located behind the lower front panel, the inlet valve controls water entering the tub. If the valve screen is clogged with sediment, water flow is restricted. Shut off water, disconnect the supply line, and remove the valve screen. Rinse and reinstall. If the valve doesn’t open (test with a multimeter for continuity), replace it, valves cost $20–$50 and are secured with screws and a hose clamp.
Evaluate detergent and loading. Use fresh detergent (old pods lose effectiveness) and avoid overloading, which blocks spray arms. Don’t rinse dishes excessively before loading, modern detergents need some soil to activate enzymes. The experts at Family Handyman note that proper loading and detergent type can resolve many perceived appliance failures without any mechanical repair.
Repairing Leaks and Water Issues
Leaks are often gasket or hose problems, both of which are DIY-friendly fixes. Start by identifying the leak source.
Door gasket (seal). Open the door and inspect the rubber gasket running around the tub opening. Look for cracks, tears, or areas that have hardened and lost flexibility. Wipe the gasket with a damp cloth and mild detergent to remove buildup, sometimes a clean gasket reseals properly. If damaged, pry out the old gasket (it sits in a channel) and press in a replacement. Gaskets are model-specific and cost $15–$30.
Hose connections. Check the water inlet line where it connects to the valve and the drain hose at both ends. Tighten any loose connections with an adjustable wrench. If a hose is cracked or brittle, replace it. Drain hoses are typically 5/8-inch ID (inner diameter) corrugated plastic or rubber and sold by the foot at hardware stores.
Pump and tub seals. Water pooling beneath the dishwasher during or after a cycle may indicate a failing pump seal or cracked tub. Pull the unit forward and inspect the pump housing and tub floor for cracks. Pump seals can be replaced, but this is a more involved repair. Tub cracks generally aren’t repairable, replacement is often more cost-effective than repair.
Float switch and overfill. If water overflows from the tub, the float switch (a small plastic dome at the tub bottom) may be stuck. Lift and clean it, ensuring it moves freely. If the switch is faulty, water will continue to enter and overflow. Testing the switch requires a multimeter. According to data on dishwasher repair costs, professional leak repairs typically range from $175 to $325, but many seal and hose issues cost under $50 in parts when handled as DIY.
When to Call a Professional vs. DIY
Most drainage, cleaning, and minor leak issues are within reach of a confident DIYer. Clogged filters, hose kinks, and spray arm blockages require no special skills and minimal tools. Replacing gaskets, inlet valves, and drain pumps is straightforward for anyone comfortable with basic hand tools and following a manual.
Call a professional for:
- Electrical or control board failures (requires diagnostic tools and expertise)
- Cracked tubs or major component replacements (motor, circulation pump)
- Persistent leaks after gasket and hose replacement (may indicate tub or seal damage)
- Situations where the appliance is still under warranty (DIY work can void coverage)
- Hardwired units if you’re uncomfortable working with household wiring (always follow NEC guidelines or hire a licensed electrician)
If searching for washer dryer repair, dishwasher maintenance near me, or appliance repair near me refrigerator, platforms like HomeAdvisor can match homeowners with local, vetted technicians. For washer and dryer repair service or fix dishwasher near me needs, compare quotes and check reviews before committing.
Consider cost versus effort. A $40 pump and an hour of labor is a clear DIY win. A $200 control board on a 12-year-old dishwasher may not justify the repair cost compared to replacement. When in doubt, get a diagnostic from a washer and dryer service or cheap refrigerator repair near me provider, many charge a flat fee that’s credited toward the repair if you proceed.
Conclusion
Dishwasher repairs don’t have to be intimidating. Clearing filters, unclogging drains, replacing gaskets, and cleaning spray arms solve the majority of problems without calling for a washer dryer repair service near me or washer & dryer repair service near me. With basic tools, safety precautions, and the guidance above, homeowners can restore full function to their appliances and avoid unnecessary service calls. Tackle the simple stuff confidently, and know when it’s time to hand off more complex electrical or structural issues to a pro.