")

Table of Contents
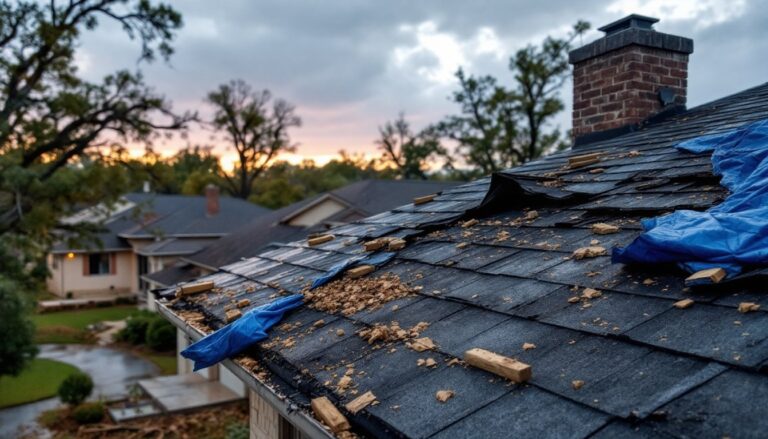
ToggleA leaking travel trailer roof doesn’t announce itself politely. It shows up as a water stain on the ceiling, a musty smell after a rainstorm, or, if you’re really unlucky, a soft spot underfoot. The good news? Most RV roof repairs are well within reach of a determined DIYer armed with the right materials and a weekend afternoon. Unlike home roofs, trailer roofs are low-profile and accessible, making inspection and patching straightforward. This guide walks through identifying damage, gathering supplies, and executing repairs that’ll keep your rig watertight for seasons to come.
Key Takeaways
- Early detection of travel trailer roof damage through visual inspection prevents expensive interior water damage and extends the lifespan of your RV.
- Proper surface preparation—cleaning, removing failed sealant, and ensuring dry conditions above 50°F—is essential for repairs to last and adhere correctly.
- Minor cracks and small holes can be sealed with self-leveling lap sealant in just an hour or two, while larger damaged areas over 1 inch require patch material applied with primer and sealed edges.
- Travel trailer roof types (EPDM rubber, TPO, or fiberglass) require different materials and repair techniques, so confirm your roof type before purchasing supplies.
- Consistent maintenance—including resealing lap joints annually, cleaning twice yearly, and reapplying roof coating every 3–5 years—can extend roof life to 15–20 years.
- If damage exceeds 30% of the roof surface or involves structural rot, professional repair services are recommended instead of attempting DIY methods.
Signs Your Travel Trailer Roof Needs Repair
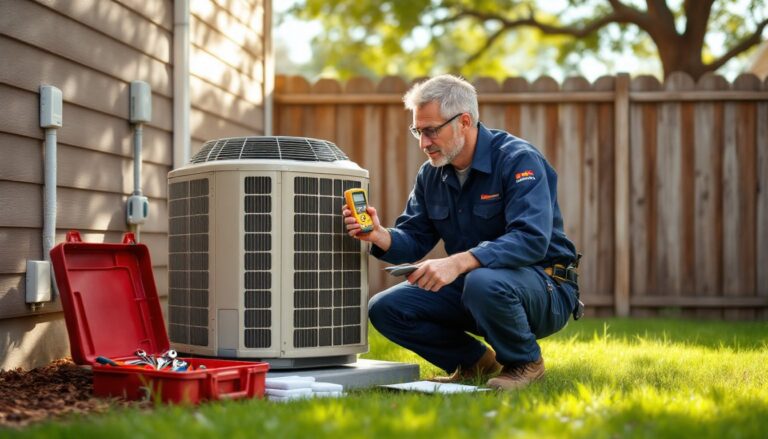
Catching roof damage early prevents expensive interior repairs down the line. Start with a visual inspection from ground level, look for obvious sagging, discoloration, or debris accumulation.
Once on the roof (use a sturdy ladder and check weight ratings: most RV roofs support 250 lbs but verify your model’s spec), inspect these common trouble spots:
- Seams and lap sealant joints: These fail first. Look for cracked, peeling, or missing sealant around roof vents, AC units, antennas, and edge trim.
- Membrane surface: EPDM rubber roofs show chalking or cracking when UV-damaged. TPO and fiberglass roofs may bubble or delaminate.
- Ponding areas: Water that doesn’t drain indicates low spots where membrane integrity is compromised.
- Interior indicators: Brownish stains on ceiling fabric, soft spots when walking, or condensation between layers all point to active leaks.
Poke suspect areas gently with a screwdriver. Soft or spongy substrate means water has reached the plywood decking, that’s structural damage requiring more extensive repair. Minor surface cracks and failed sealant joints, but, are perfect candidates for DIY patching.
Essential Tools and Materials for Roof Repair
Gather everything before climbing up. Multiple trips up a ladder waste time and test patience.
Tools needed:
- Utility knife with fresh blades
- Putty knife or plastic scraper (for removing old sealant)
- Paint roller with extension pole
- Paintbrush (2–3 inches wide)
- Caulk gun
- Tape measure
- Shop vacuum or leaf blower
- Safety gear: non-slip shoes, safety glasses, and work gloves
Materials list:
- Roof cleaner: Use a cleaner formulated for your roof type (EPDM, TPO, or fiberglass). Avoid petroleum-based solvents on rubber roofs.
- Lap sealant: Self-leveling sealants like Dicor or Pro Flex work for seams and penetrations. Get the right formula, some are for vertical, others for horizontal surfaces.
- Roof coating: Elastomeric coatings for EPDM: acrylic for fiberglass. Budget about one gallon per 100 square feet.
- Patch material: EPDM tape or fiberglass repair kits, depending on roof type.
- Primer: Required for some tape adhesives and coatings, check manufacturer specs.
- Rags and mineral spirits: For cleanup (check compatibility with your roof membrane first).
Most trailer roofs fall into three categories: EPDM rubber (black, flexible), TPO (white, welded seams), or fiberglass (hard, gel-coated). Confirm yours before buying materials, products aren’t interchangeable. When estimating quantities for professional-grade repairs, resources like cost estimators can help budget larger projects, though DIY material costs typically run $150–$400 for a standard 20-foot trailer.
Preparing Your Travel Trailer Roof for Repair
Prep work determines whether your repair lasts one season or ten. Don’t rush this phase.
Cleaning the surface is non-negotiable. Dirt, oxidation, and old sealant residue prevent new materials from adhering. Use a roof-safe cleaner and a stiff-bristle brush to scrub the entire surface, paying extra attention to repair zones. Rinse thoroughly and let dry completely, 24 hours in dry weather, longer if humid. Moisture trapped under patches guarantees failure.
Remove failed sealant with a putty knife, working carefully to avoid gouging the membrane. Old lap sealant gets brittle and peels away in strips. Stubborn residue comes off with a plastic scraper and patience. For EPDM roofs, a bit of mineral spirits on a rag helps, but test in an inconspicuous spot first.
Inspect and mark damage areas with painter’s tape. Measure each spot to determine patch size, add 2 inches beyond the damaged edge on all sides for proper overlap.
Check the weather forecast. You need at least 24–48 hours of dry conditions above 50°F for most sealants and coatings to cure properly. Applying materials in cold or damp conditions leads to poor adhesion and wasted effort.
If you find extensive damage, more than 30% of the roof surface or structural rot in the decking, this may be time to consult professional repair services rather than proceeding with DIY methods. Structural work often requires removing and replacing sections of the roof substrate, which gets complicated fast.
Step-by-Step Repair Process for Common Roof Damage
Sealing Cracks and Small Holes
Minor cracks (under 1/4 inch wide) and pinhole leaks around fasteners are the most common issues. These repairs take an hour or two.
- Clean and dry the area as described above. Wipe down with denatured alcohol if needed to remove any film.
- Apply lap sealant directly into cracks using a caulk gun. For EPDM roofs, use a self-leveling formula. Overfill slightly, sealant shrinks as it cures.
- Smooth with a putty knife dipped in dish soap (prevents sticking). Feather the edges so there’s no abrupt lip.
- Seal around roof penetrations by applying a generous bead of sealant where vents, pipes, or mounting hardware meet the membrane. Don’t skimp, these joints take the most UV and thermal stress.
- Allow full cure time per manufacturer instructions, typically 24–48 hours before exposing to moisture.
For screw holes or small punctures, a dab of sealant works, but if the fastener is loose, remove it, fill the hole with sealant, and relocate the fastener slightly to bite into solid material.
Patching Larger Damaged Areas
Holes, tears, or damaged sections over 1 inch across need a patch, not just sealant.
- Cut the patch material to size, at least 2 inches larger than the damage on all sides. Round the corners: sharp corners lift over time.
- Apply primer to both the roof surface and the patch if using EPDM tape or certain adhesives. Let it flash off (turn tacky) per product directions, usually 3–5 minutes.
- Position and press the patch firmly, working from the center outward to eliminate air bubbles. Use a roller or the heel of your hand.
- Seal the edges with lap sealant, creating a watertight perimeter. Feather the sealant out onto the roof surface for a smooth transition.
- Apply a roof coating over the entire repaired area (and ideally the whole roof) once patches cure. Use a roller for even coverage, about 1 gallon per 100 square feet. Two thin coats beat one thick coat for durability.
For fiberglass roofs, use a fiberglass repair kit with resin and cloth. Layer the cloth, saturate with resin, smooth out wrinkles, and sand smooth once cured before applying gel coat or paint. Detailed repair techniques for fiberglass work follow standard boat repair methods.
If you encounter delamination (the top membrane separating from the substrate), that usually means water intrusion has destroyed the bond. Small areas can sometimes be re-adhered with contact cement applied to both surfaces, pressed together, and weighted. Large delaminated sections often require professional replacement.
Preventive Maintenance Tips to Extend Roof Life
Repairs buy you time. Maintenance buys you years.
Inspect every 3–6 months, especially after long trips or severe weather. Catching a failing seam early takes ten minutes and a tube of sealant. Ignoring it leads to interior damage costing thousands.
Clean the roof twice a year minimum. Tree sap, bird droppings, and road grime are mildly acidic and degrade membranes over time. A gentle wash with approved cleaner and a soft brush does the job.
Reapply roof coating every 3–5 years, depending on climate and UV exposure. Southern climates demand more frequent coating due to intense sun. The coating is your primary UV barrier, when it chalks or thins, the membrane underneath deteriorates fast.
Reseal lap joints and penetrations annually. Even if sealant looks intact, UV exposure breaks it down. Peel away old material that’s cracked or shrunk, and apply fresh sealant. This single habit prevents 80% of RV roof leaks.
Avoid walking on the roof unnecessarily, but when you must, wear soft-soled shoes and step on structural members (near walls and cross-braces) rather than mid-span areas. Foot traffic concentrates stress and can crack brittle membranes.
Keep tree branches clear. Even minor abrasion from overhanging limbs wears through coatings and scratches membranes, creating entry points for water.
Check and maintain your RV cover if you use one. A poor-fitting cover that rubs in the wind does more harm than leaving the trailer uncovered. If storing outside long-term, a breathable, properly secured cover protects the roof from UV while allowing moisture to escape.
With consistent attention, an RV roof lasts 15–20 years before needing replacement. Neglect cuts that lifespan in half.